How build a Jumpseller App
A Jumpseller App is an application that interacts with one or more online stores that use Jumpseller. The App can be loaded through an iframe insid...
Automatic invoicing improves your sales process by reducing manual work, minimizing human errors, and making order management easier.
With Jumpseller, integrating an external invoicing system is straightforward.
Merchants can choose between:
Comprehensive Integration
Build and publish a full invoicing App that connects with Jumpseller using webhooks, OAuth2, and the complete API. This method offers maximum flexibility and supports advanced business logic.
Lightweight Integration
Provide a single invoicing endpoint that Jumpseller calls directly when a merchant chooses to generate an invoice for an order. This method is quick to set up and ideal for simple invoicing workflows.
To integrate an invoicing system with your store, you will need:
Typical flow between Jumpseller and the invoicing system:
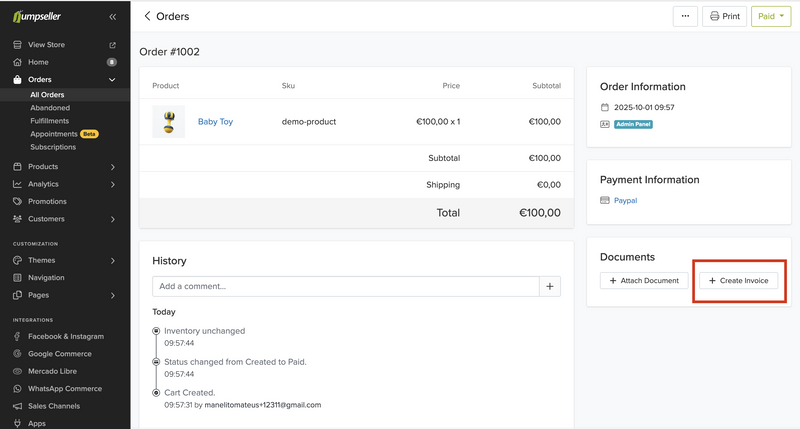
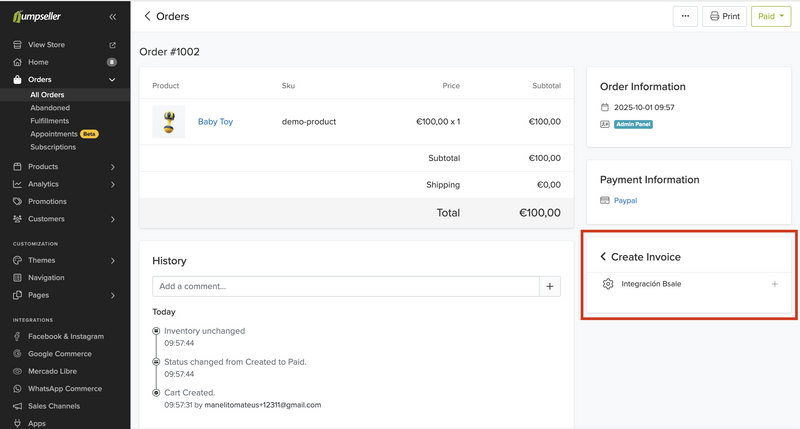
Order Created webhookPOST to the selected endpointThe “Create Invoice” option will appear inside the order view in the Jumpseller Admin.


Method: POST
URL: https://your-service.com/invoices
{
  "order": {
    "id": 1020,
    "created_at": "2024-11-05T11:26:30Z",
    "currency": "USD",
    "subtotal": 10.0,
    "total": 10.0,
    "status": "paid",
    "customer": {
      "email": "customer@example.com",
      "fullname": "John Smith",
      "tax_id": "US123456789"
    },
    "products": [
      {
        "name": "Premium T-Shirt",
        "price": 10.0,
        "quantity": 1,
        "sku": "TSHIRT-01"
      }
    ],
    "billing_address": {
      "country": "US",
      "zip": "10001"
    }
  }
}
{
  "url": "https://your-service.com/invoices/INV-1020",
  "public_id": "INV-1020",
  "message": "Your invoice was created successfully"
}
{
  "message": "Customer tax ID is required for invoice generation"
}
order.id (integer) – Unique order IDorder.total (float) – Grand total amountorder.customer.tax_id (string) – Tax identification numberurl – Required – Browser-viewable invoice URLpublic_id – Required – Invoice reference IDmessage – Optional – Message to display to merchant after successPOST data to your integration.Attach invoice details to the Jumpseller order:
POST /orders/{id}/documents.json
Include document type, ID, and URL.
invoice_id.Use HMAC-SHA256 signatures to verify that requests are from Jumpseller.
This requires implementing OAuth2 to obtain a hooks_token.
Content-Type: application/json (Required)Jumpseller-Store-Code: Store identifier (Required)Jumpseller-Hmac-Sha256: Base64-encoded signature (Required)Ruby
def verify_request(request)
  hooks_token = store.webhook_verification_token
  return false unless hooks_token

  hmac_header = request.headers['Jumpseller-Hmac-Sha256']
  digest = OpenSSL::Digest.new('sha256')
  hmac = Base64.encode64(
    OpenSSL::HMAC.digest(digest, hooks_token, request.raw_post)
  ).strip

  hmac == hmac_header
end
Node.js
const verifyRequest = (rawBody, hooks_token, headerSig) => {
  const hmac = crypto.createHmac('sha256', hooks_token);
  hmac.update(rawBody);
  return hmac.digest('base64') === headerSig;
};
Python
def verify_request(raw_body: str, hooks_token: str, header_sig: str) -> bool:
    digest = hmac.new(
        hooks_token.encode(),
        raw_body.encode(),
        hashlib.sha256
    ).digest()
    return base64.b64encode(digest).decode() == header_sig
type = 'gift_card' should have 0% VAT.order.gift_cards_amount > 0), note it in the invoice.If you are implementing the Lightweight Integration, fill out this form so our team can review and approve your endpoint:
Lightweight Integration Application Form
"YYYY-MM-DD HH:MM:SS UTC". Convert to your desired timezone.If you have questions or feedback about this guide, please contact our support team. We’re here to help.
Free trial. No credit card required.